

INSTALLING A NEW SSL-VPN CERTIFICATE (To Renew Certificate, see separate article here)
- Generate a new CSR to be signed by the CA
- Under System -> Certificates -> GenerateCreate a new Certificate Name
Populate OU, Organization, City, Country and Email Address 
- Under System -> Certificates -> GenerateCreate a new Certificate Name
- Download the .CSR file
- Go back to Certificates page, Highlight the new Certificate Name you just created and click ‘download’
- Send CSR to your CA for signing and to generate Certificate file.
- Once cert is generated. Import the cert file.
- Send CSR to your CA for signing and to generate Certificate file.
- Under Import -> Local Certificate
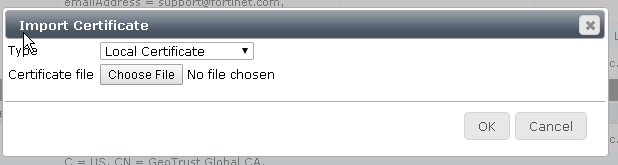 Once imported, it will show up on the list. With CN details and with status OK (not shown on screenshot)
- Under Import -> Local Certificate

Status OK means your cert is ready and ready to be associated to your SSL-VPN.
5. Apply the certificate to the SSL-VPN.
Go to VPN -> SSL -. Settings
Select the new certificate

And you are good to go.
TIP: Always a good practice to use FQDN rather than IP Address .
Using IP Address will return to you with this error message as the VPN is not associated with the certificate which is annoying. (unless you associate the cert with the IP Address, of course)

Coming Next: Guide on renewing SSL certficate for VPN via CLI
